
How to sign up for ReviewForest
Setting up your account costs nothing. You only pay once you activate your subscription. Sign-up takes a few minutes and has four stages: create your account, connect your business, set up your review forest page and choose your tree planting settings.
1. Create your account
Section titled “1. Create your account”-
Go to app.reviewforest.org/signup.
-
Click Sign up with Google. Or enter your email address and a password with at least six characters, agree to the terms of service and privacy policy, and click Create account.
-
Answer two short questions: your business goals and how you heard about ReviewForest. You can Skip both.
2. Connect your business
Section titled “2. Connect your business”-
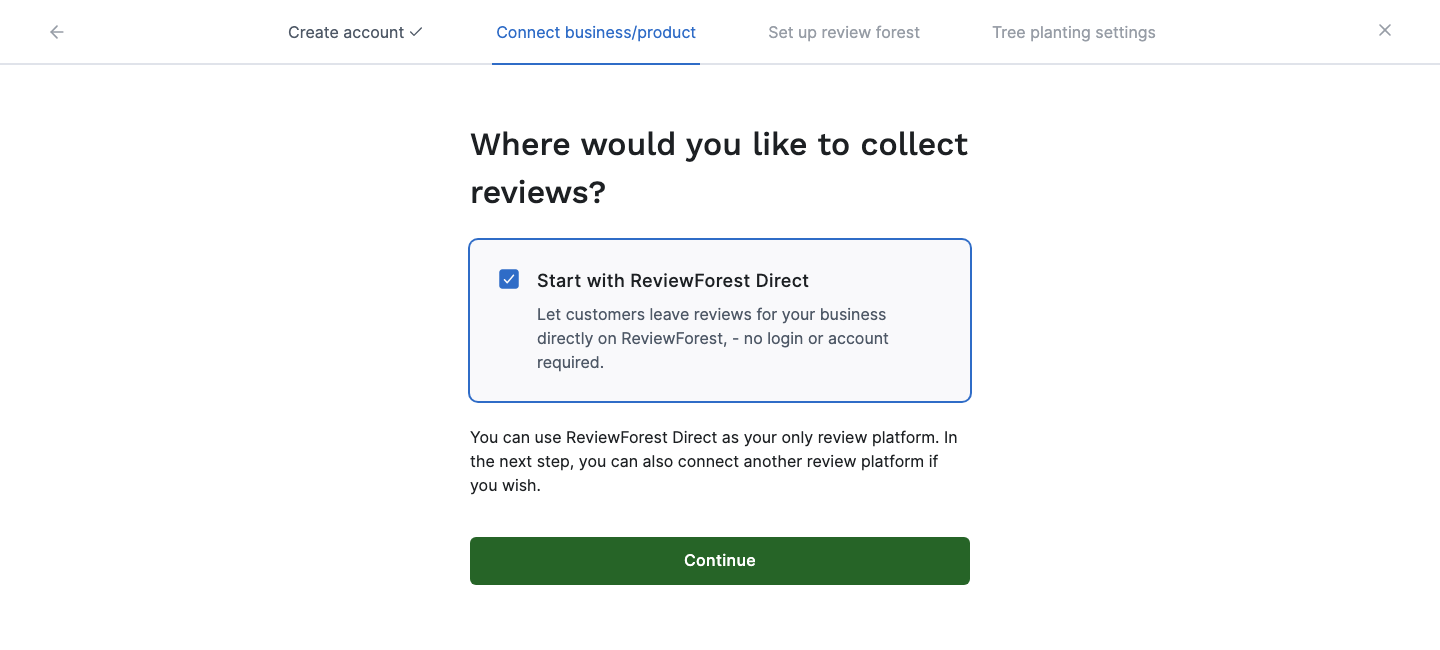
Choose where you want to collect reviews. Start with ReviewForest Direct is already ticked: your customers can then review you directly on ReviewForest, without an account or login. You can also use ReviewForest Direct as your only review platform. Click Continue.
-
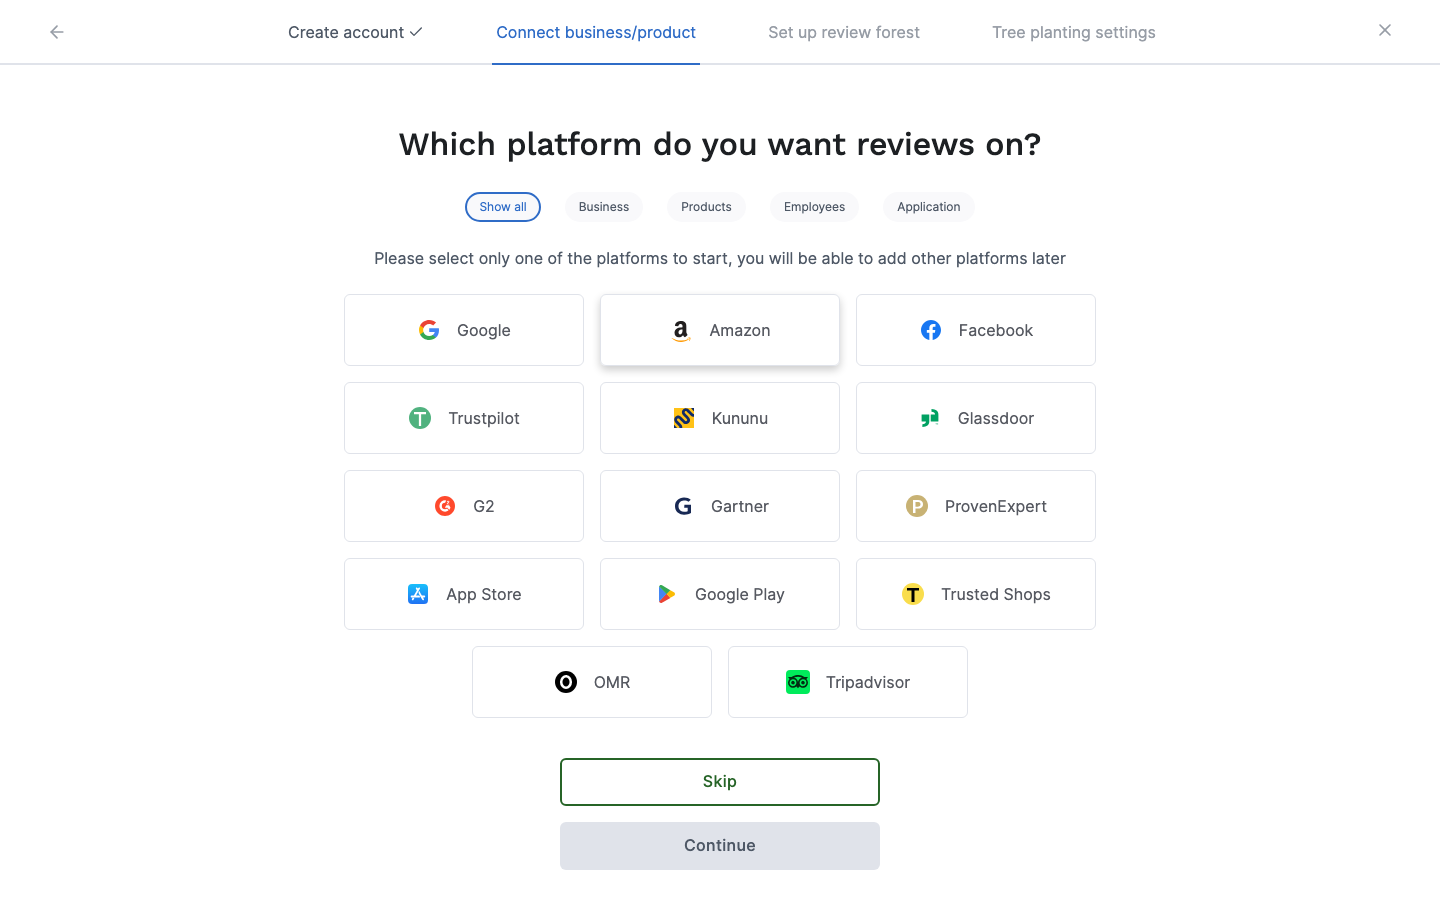
Choose one review platform, for example Google, and click Continue. On Premium and Professional you can connect more platforms later. Standard includes one platform per review forest, plus ReviewForest Direct. If you only want to use ReviewForest Direct, click Skip.
-
Find your business on that platform. For Google, type your business name or address and pick it from the suggestions. If you have several locations, add them one by one: each location gets its own review forest and adds to the price. Then click Connect. For most other platforms, you paste the link to your profile there. For Amazon, you choose your marketplace and enter the ASIN codes of your products.
Your business doesn’t show up on Google? See I can’t find my business.
3. Set up your review forest page
Section titled “3. Set up your review forest page”Your review forest page is where your customers leave a review and see the trees you’ve planted. Enter its name and web address and click Save & continue. If you’ve added several locations, you go through them one by one with Set up next review forest, and the last one has Save & continue.
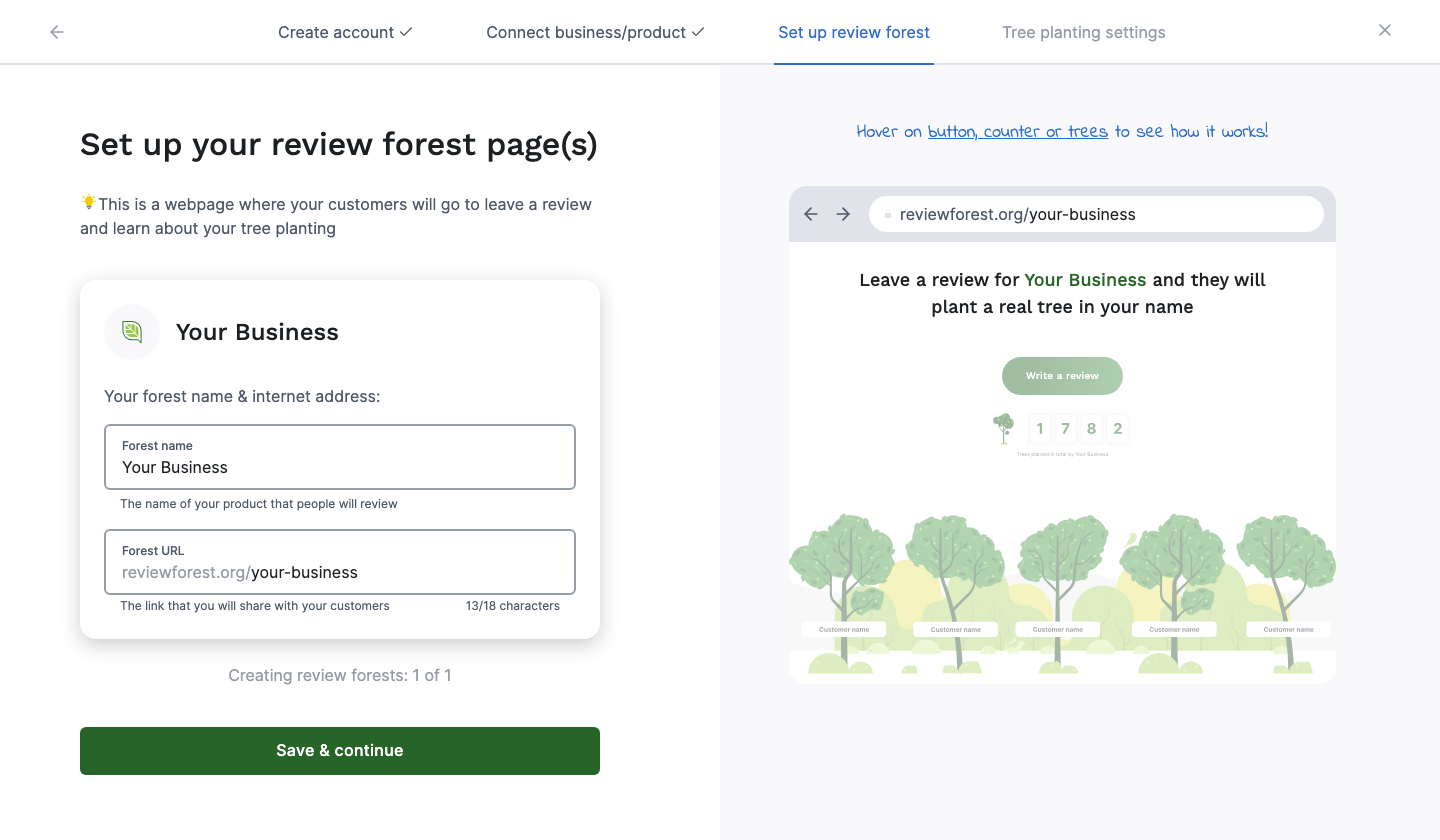
- The name needs at least four characters.
- The address after reviewforest.org/ has 4 to 18 characters: letters without umlauts or accents, numbers and hyphens, and it can’t end with a hyphen. For “Müller”, use “mueller”, for example. If the address is already taken, the field tells you.
- You can change both later under Review forests > Manage > Change name & URL. If you change the address, the old link stops working, see how to change your forest’s URL.
4. Choose your tree planting settings
Section titled “4. Choose your tree planting settings”-
Pick a planting project. Each project shows a starting price per tree. What you actually pay per tree depends on the plan you choose when you activate. You can change the project for each review forest later.
-
Would you like help getting started? Click Book a call and pick a time. Otherwise click Continue.
-
Decide whether to set a planting limit. Maybe later means no limit. With Set limit you choose 50, 100 or 500 trees, or a custom number of at least 50. Then click Start growing.
What happens next
Section titled “What happens next”You land on the Get started page, where we offer you a short tour. Your review forest is set up, but it isn’t active yet: your forest page says “This forest is inactive.”, and we don’t plant any trees until you activate your subscription. Here’s how: Activate for the first time.
Once your subscription is active, we plant a tree for every new review on your connected platforms, until your planting limit is reached. “New” counts from when you connected the platform during sign-up, so reviews that come in before your activation get trees too, and you pay for them like for any other tree. Reviews from before you signed up don’t get trees automatically, but you can plant trees for them afterwards.