
Install a ReviewForest widget
Every ReviewForest widget gets onto your website the same way. You create it in your ReviewForest dashboard, copy its code and paste that code into your website. The first part is the same for every website. For the second part, pick the guide for your platform further down.
Step 1: Create the widget and copy the code
Section titled “Step 1: Create the widget and copy the code”-
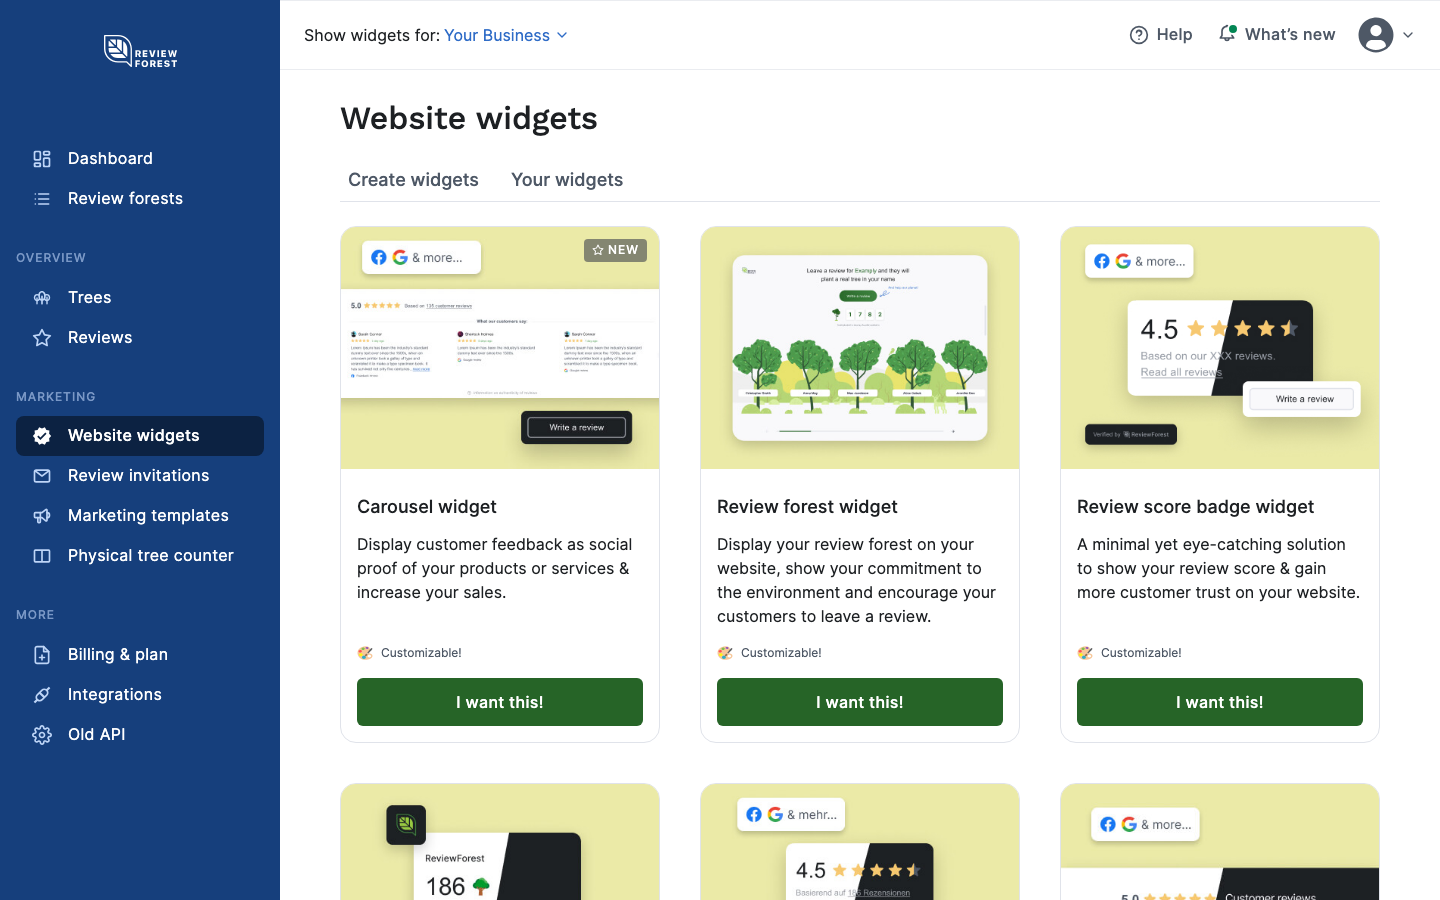
In your ReviewForest dashboard, click Website widgets in the menu on the left. The Create widgets tab shows all widgets.
-
Click I want this! on the widget you want.
-
Choose what the widget shows and click Next. For all widgets except the review forest widget, the next step, Appearance, lets you change the colors, see Customize your widget’s colors and style.
-
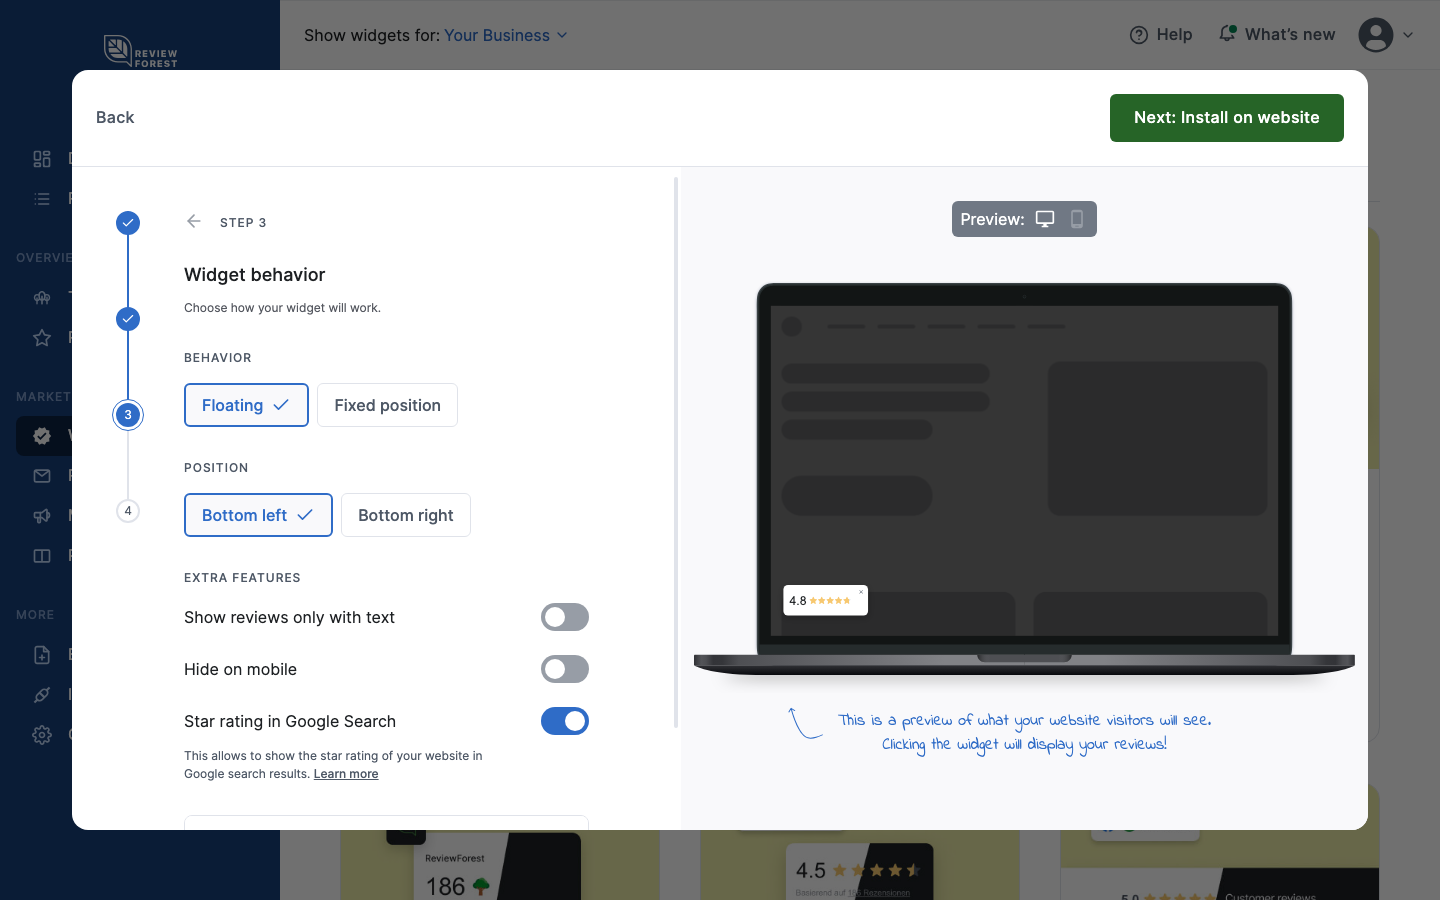
The review score badge, the tree counter badge and the 2 in 1 badge then ask how they should behave:
- Floating: the badge stays in a bottom corner of the screen while visitors scroll. Choose Bottom left or Bottom right.
- Fixed position: the badge sits exactly where you paste the code, like a picture in your text.
-
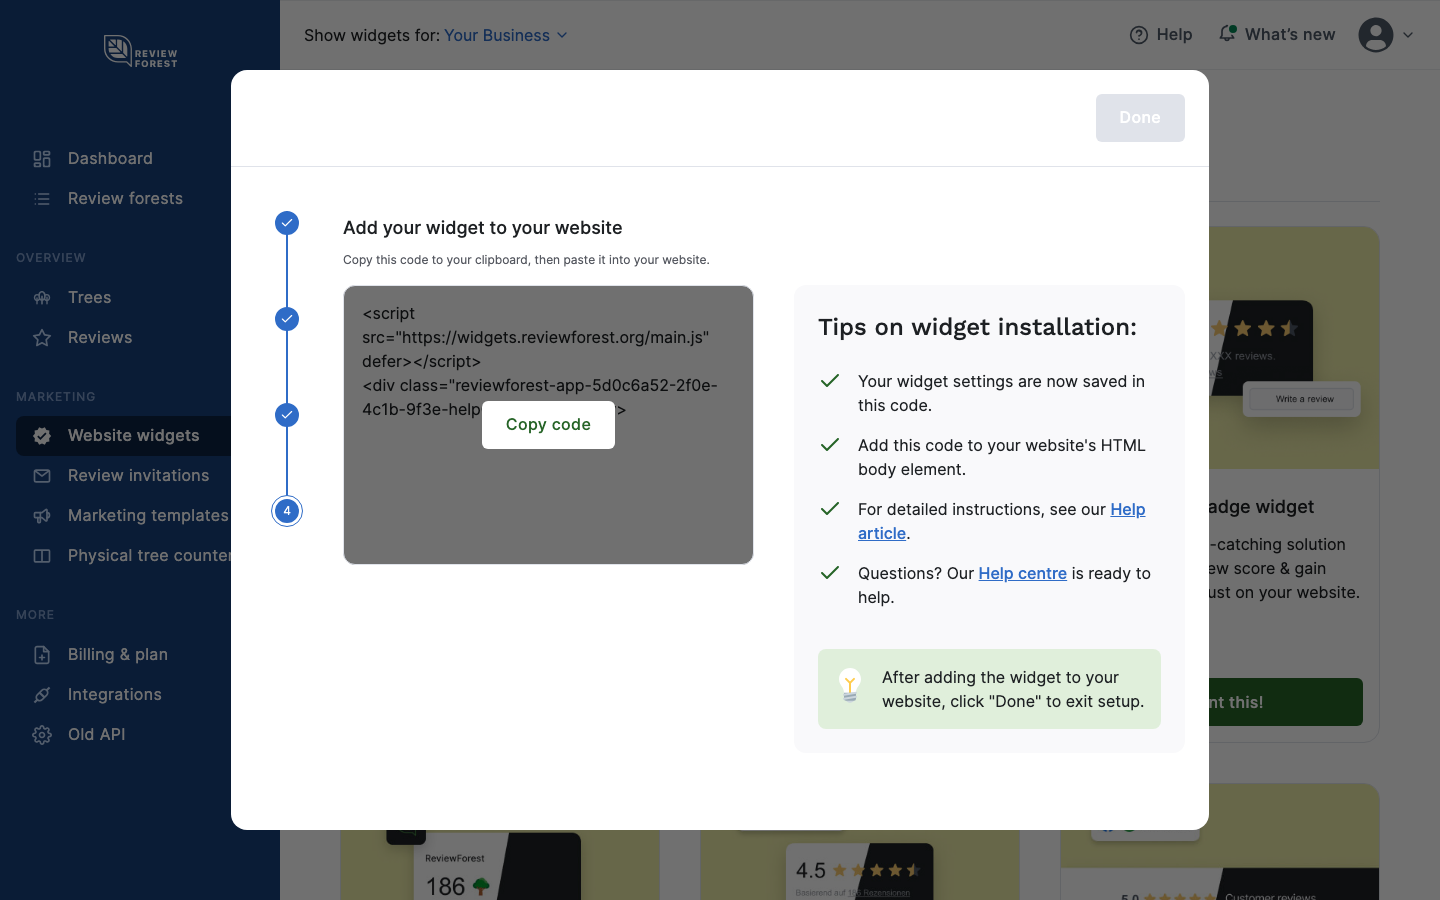
Click Next: Install on website. Move the mouse over the code box and click Copy code.
-
Paste the code into your website, see step 2 below. Then click Done in the dashboard.
Already created your widget? Open the Your widgets tab and click the copy icon (Copy code) in the widget’s row.
What the code looks like
Section titled “What the code looks like”The code has two lines:
<script src="https://widgets.reviewforest.org/main.js" defer></script><div class="reviewforest-app-..."></div>The first line loads the widget. The second line marks the spot where it appears, and the letters and numbers after reviewforest-app- identify your widget. We store your settings on our side, so when you change the widget in the dashboard later, your website shows the change without new code.
- Paste both lines together into a field meant for HTML code. Website builders call it HTML, Code, Embed or Custom code. A normal text field shows the code as text or removes it.
- With several widgets on one page, the first line only needs to be there once. Having it twice does no harm.
Step 2: Paste the code into your website
Section titled “Step 2: Paste the code into your website”Where the code goes depends on the widget:
- Floating badge: the badge always appears in the corner you chose, no matter where the code sits. Paste the code into the part of your website that appears on every page, usually the footer or a field for custom code, and the badge shows up everywhere.
- All other widgets, for example fixed-position badges, the carousel, the review forest widget or the mini widgets: paste the code exactly where the widget should appear, using an HTML or code block in that page. The review forest widget is made for the full width of the page. The carousel also works in a narrow spot, but shows more reviews side by side when it has room.
Pick your platform:
Your platform isn’t listed? Look for a field for HTML code or custom code in its settings or editor, and follow the two rules above.
Working in a code editor?
Section titled “Working in a code editor?”If you build your website in code, an AI coding agent can place the widget for you.
The widget doesn’t show up
Section titled “The widget doesn’t show up”- Look at the published page. Some website builders don’t run widget code in their editor or preview.
- Check that both lines are on the page, pasted into a field for HTML code.
- Clear the cache of your website, for example in your caching plugin, and reload the page.
- If your website only allows scripts from approved addresses (a Content Security Policy), allow
https://widgets.reviewforest.orgfor scripts (script-src) andhttps://api.reviewforest.organdhttps://cdn.comvi.iofor data (connect-src). These are the basics: the review forest widget also loads a map from Mapbox and adds its own styles, so it may need more. Your browser’s developer console lists anything that gets blocked.
Still stuck? Write to us in the chat in your dashboard and send us the address of the page.
The “Review widget” page on the Grandfather plan
Section titled “The “Review widget” page on the Grandfather plan”If your invoices say “Grandfather plan”, you’re one of our earliest customers, and the menu also shows Review widget. That is our tree counter from before the Website widgets page, with its own code. Click Install there and select Floating widget, Badge widget or both. For the floating widget, choose a corner. Copy the code with Copy to clipboard and paste it on every page that should show the counter. For the badge widget, also paste the second, short code where the badge should appear.
On the Grandfather plan, the Website widgets page offers the review forest widget. For the other widgets, the dashboard suggests switching to a current plan.